
Fine Method to remove video black bars on Windows
ApowerEdit
There’s a powerful video editing program called ApowerEdit. This program features comprehensive functionality in media file editing, such as trimming, cropping, adding filter, transition and adjusting resolution, framerate and so forth. To remove black bar from video with this video editor, you can try to use its cropping function. The basic steps are as below.
- Click the button below to download and install ApowerEdit on your computer.
- Launch the program and then add the target video.
- Right-click the media item and then choose “Add to Project”.
- Click the “Crop” option and then select the image without black bars on the function panel.
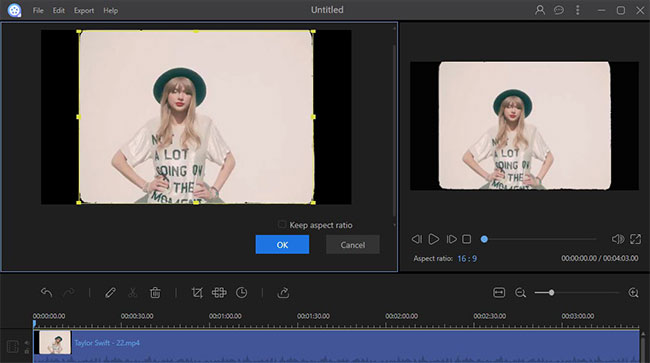
- Click OK button to confirm changes.
- Press “Export” > “Export video” to generate the video.

How to Remove Black Bar from Video while Keep Its Quality on Mac?
Apowersoft Video Converter for Mac
There are many useful tools out there for cropping black bar from video. One such program we can utilize is Apowersoft Video Converter for Mac. True to its name, this program is developed for converting media files to different formats and devices without corrupting their quality. It is also able to cut out black bars and adjust the aspect ratio compatible with the device. The intuitive interface makes it available for people with any skill level to use. Follow below instruction to know how to remove black bar from video with it.
- Download and install Apowersoft Video Converter for Mac.Download
- Run the program and click “+ Add” or drag your files to the main interface.
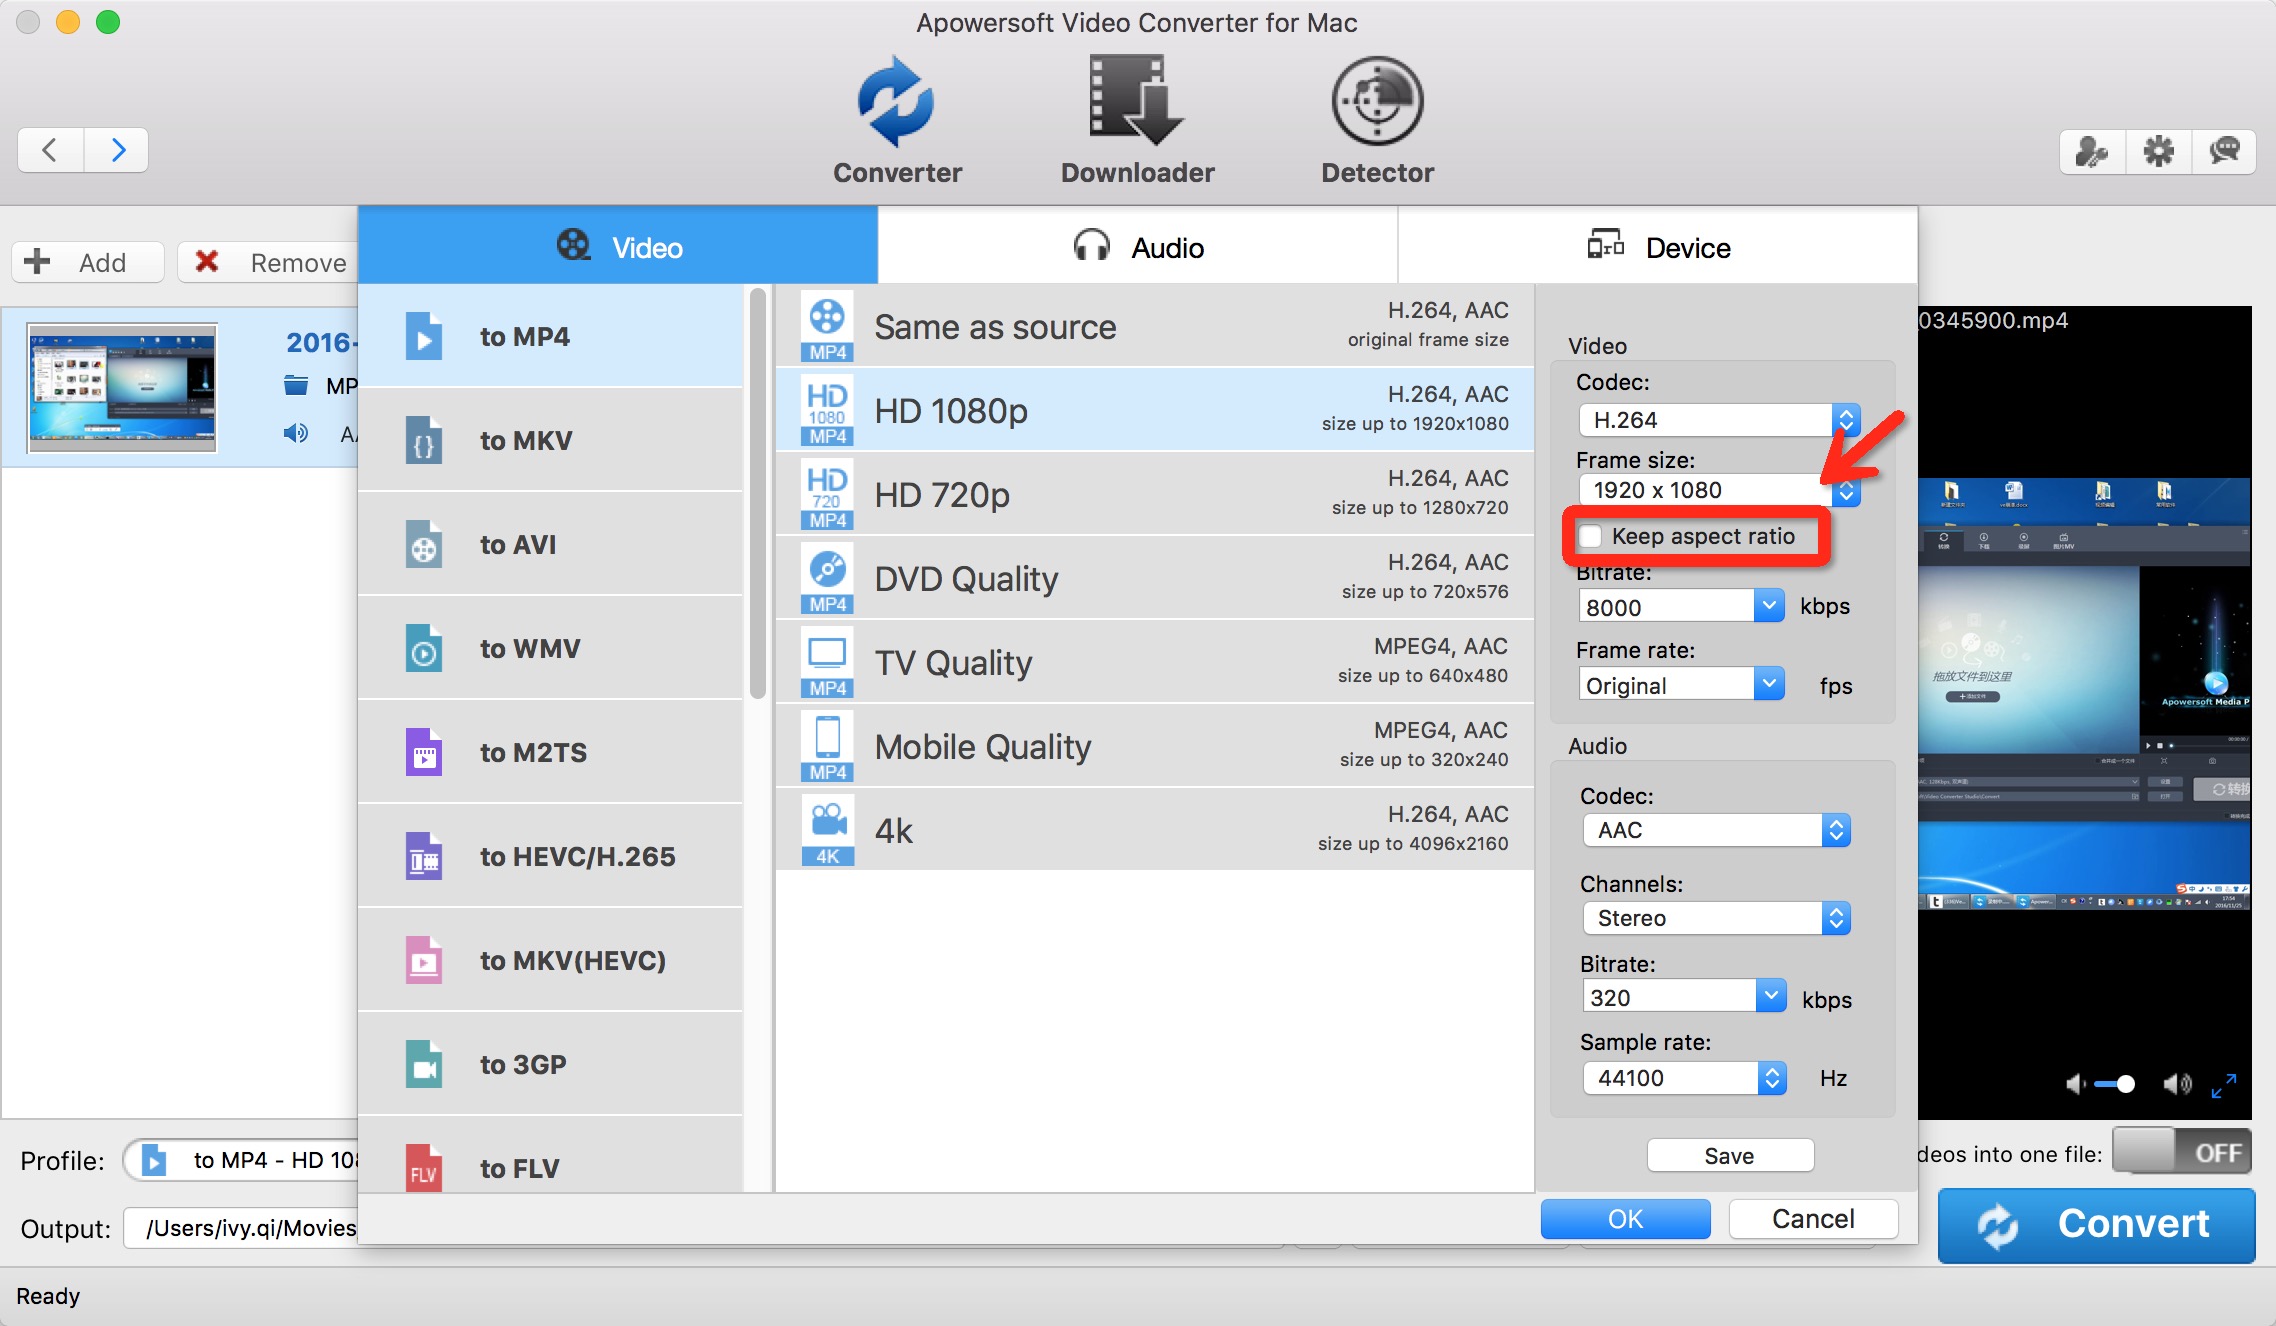
- Drop down “Profile” and choose your preferred format for your video. Go to “Frame size” under “Video” and choose the aspect ratio, for instance, if you want to set 16:9 as the ratio, you need to select 1920×1080, then uncheck “Keep aspect ratio”.
- Press “Convert” button if everything you want to configure is well. The created file won’t have black bars around.

We’ll find the converted file quality is really good and black bars are deleted from the video. Now is the time to enjoy the movie in full screen. In addition to this feature, this software also acts like a movie downloader. We can download as many films from Internet as we want.
Apple iMovie
iMovie is also a great tool to use. As a video editing app developed by Apple Inc., this software can also work as a black bar removal for Mac. It is known to all that iMovie is a free app that can split, trim, cut, add effects, add transitions, etc. If you have no idea about deleting black bars with it, you can follow up below guide.
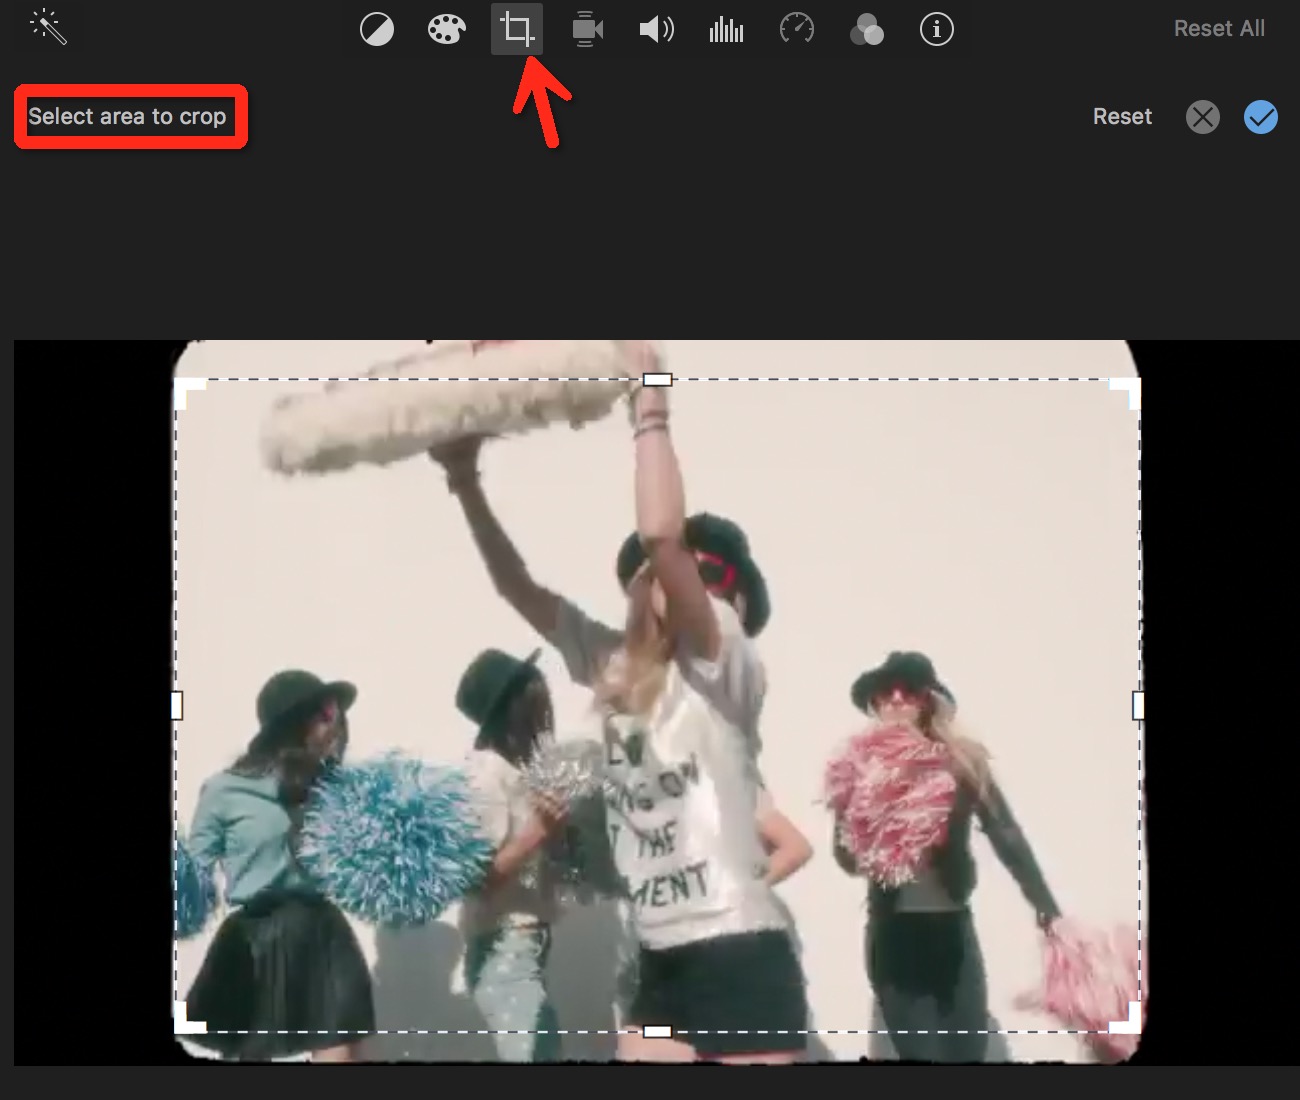
First, import your video file on the main interface. Then drag the file to the timeline and press the cropping tool. You will see “Crop to fit” option, press that and deselect the black bars on your video. After that, click the blue check button or press anywhere to save the changes. Lastly, click on “Share” > “Export movie”.
Truth to tell, even though iMovie is a very powerful editing app for Mac, I do not suggest it for just removing black bar from video. It sometimes crashes and the most importantly, the interface is complex for common people. If you insist on it, do further study on it.
QuickTime
QuickTime is famous as a multimedia player on Mac. We often use it to play audio and video files on Mac. QuickTime is more than a player if you have ever researched into its features. It features a recorder available to record audio and video. If the file is not that long in duration, cropping black bars from video by recording the whole video is a way out suppose that you only have QuickTime on your Mac.
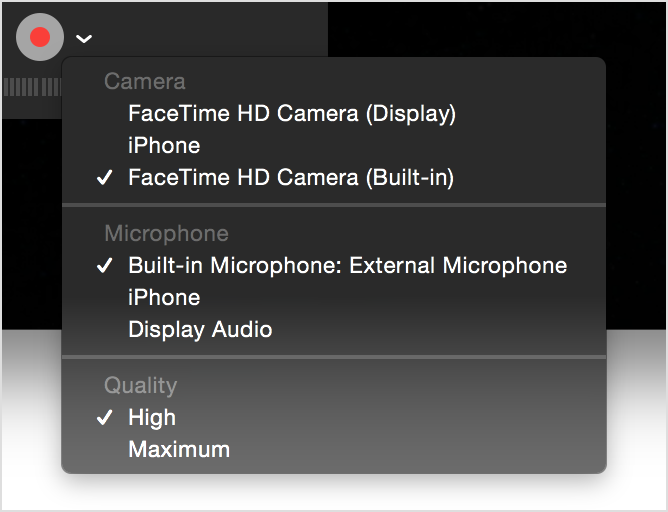
First, open your video on the player, and go to “File” > “New Screen Recording”. A pop-up window will appear showing you the recording functions. Simply click the red button then select the portion of the video without the black bars. Lastly, tap on “Start Recording” to record your video.
Note that the feature is available only for users running Mac OS X 10.6 version as well as to those who upgraded their QuickTime to Pro version.
Bottom Line
You can now play videos in full-screen mode without worrying about black bars. Tell us which one do you like best. Or if you have better suggestions, do not hesitate to leave your comment below.
Leave a Comment 1319