
When you browse your Facebook feed, you may find a new photo style appearing in which you can view at every angle. This kind of photo is called 360-degree photo, which is supported by Facebook allowing you to view a scene from every angle: above, below, behind and next to you. Facebook 360 video/photo is designed for users who want to share an immersive view of their world with friends. Meanwhile it is intended to create a fun way for the viewing audience to enjoy other people’s creations and location. In order to teach users (esp. journalists) best practices for using Facebook 360 photos in daily life, Facebook recently has launched a free three-course program. Taking and uploading a Facebook 360 photo has been a rather simple task. Everyone could make it if you follow the basic rules. Here this post will provide you with step-by-step instructions and give you some useful tips for taking a stunning 360 photo for Facebook.
How to Take and Upload a Facebook 360 Photo
Take a 360 photo
The better choice for taking a Facebook photo is using your phone. According to Facebook, if you use an iPhone or an iPad, you could take a panorama or photosphere by using one of the following:
iPhone 4S or newer
iPad mini 2 or newer
iPad Air and iPad Air 2
iPad Pro

Facebook hasn’t made a list for Android devices, but officially states that it supports Galaxy device newer than Samsung Galaxy S5 or Galaxy Note 3. What’s more, you could use a series of photo sphere apps or image-stitching software for creating a Facebook 360 video/photo, such as Street View, Google Camera, Cardboard Camera, Theta S or PTGui.
Another way to take a 360 photo is more professional. You could use a 360-enabled Camera:
Ricoh Theta S
Giroptic 360 Cam
Samsung Gear 360
LG 360 Cam
IC Realtech ALLie
360Fly
Panono
Upload and share the photo
Once you have taken a satisfactory photo, you can then upload it to your Facebook. Actually, this won’t be too complicated for you because when you upload a photo to Facebook, it will automatically be converted into a 360 photo. Thus the process will be the same as uploading a regular photo:
- Tap on the “What’s on your mind?” box at the top of News Feed.
- Click Photo/Video.
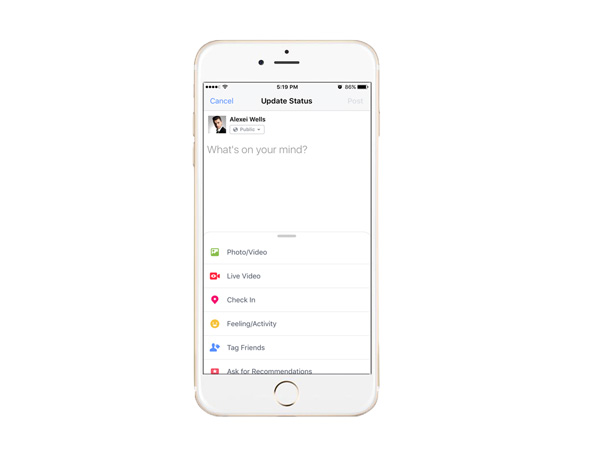
- Select a Panorama from your iPhone.
- Swipe to select starting view and then post the panorama.
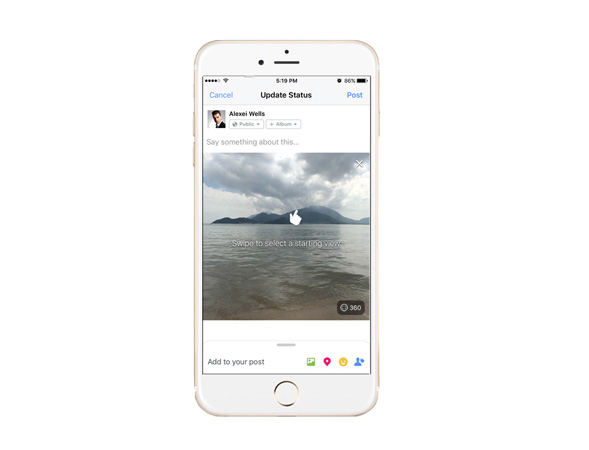
- Move your phone or drag your finger to look your photo.


Tips for Successfully Creating a Facebook 360 Photo
As a beginner, you may come across a series of troubles when you create your first 360 photo for Facebook. Therefore, in the following this post will give you some suggestions.
Do not use other devices to take a 360 photo
Facebook has officially listed some cameras and phones as the tools for taking 360 photos. And if you have none of them, you can try the supported apps. However, please do not use other devices, otherwise your photo will never be recognized by Facebook as a 360 photo.
Hold your phone or camera as steady as possible when taking a 360 photo
A 360 photo need present 360-degree field of vision. So when taking a 360 photo, you’d better slowly move your phone or camera from left to right or from right to left. In a word, keep lens in a horizontal shooting mode. And during this process, you should hold your phone or camera as steady as possible.
Think twice before editing your 360 photo for Facebook
Some people are used to editing photos for getting a better visual effect. But you’d better think twice if you are ready to edit a 360 photo. Facebook recognizes 360 photos by looking for some special data embedded in photo’s tag, but such data may be stripped from the photo during your editing. While you upload a 360 photo straight from your phone or camera, Facebook will automatically recognize or process it, and then present it as a 360 photo. To be honest, if you do want to edit a 360 photo, you can try Adobe Photoshop CC. And one thing you should remember is saving your photo by choosing “Save as”, because this operation can preserve the photo data, while “Export As” and “Save for Web” do not.
Move your phone around to view different parts of the photo
You don’t have to drag your finger to view a 360 photo. Facebook enable users to view that by holding your phone up and moving it around, which will improve the user experience and at the same time bring you a better visual effect.
Conclusion
A 360 photo is bound to let your message stand out in the Facebook Feed. Hopefully this has given you some good tips on how to make 360 photo on Facebook. We hope you can successfully create one.